Microsoft Windows 7 And 8 OneDrive Support Is Ending

Are you a OneDrive user running Windows 7, Windows 8, or Windows 8.1? If so be aware that on January 1st, 2022 your OneDrive desktop application will reach end of support.

The company offered the following by way of explanation:

“In order to focus resources on new technologies and operating systems and to provide users with the most up-to-date and secure experience beginning January 1, 2022, updates will no longer be provided for the OneDrive desktop application on your personal Windows 7, 8, and 8.1 devices.

Personal OneDrive desktop applications running on these operating systems will stop syncing to the cloud on March 1, 2022. After March 1st, 2022 your personal files will no longer sync and should be uploaded/accessed directly on OneDrive for web.”

The good news is that your OneDrive files aren’t going anywhere. So you don’t have to worry about finding a new cloud-based file storage system. This is definitely more than a minor inconvenience and yet another reason to strongly consider upgrading your PC and your OS to something more modern.

As things stand the clock is ticking for extended support for the OSes mentioned above. It won’t be long before you lose the protection offered by periodic security updates. Before that happens you need to be thinking in terms of steps to protect yourself and all your data regardless of where it lives.

Although it is highly inconvenient for people running those older Operating Systems it’s completely understandable that Microsoft is taking this stance. Though the company has deep pockets it also has a sprawling catalog of products to maintain. At a certain point they simply have to say goodbye to older applications. Upgrade before the clock runs out.

Used with permission from Article Aggregator

MANAGED IT SERVICES

CYBERSECURITY | HELPDESK | UPDATES | BACKUPS

Reduce the Coronavirus Impact On Your Team

In this time of uncertainty many businesses are still struggling to successfully adapt to working remotely.  The good news is there are tools available that many of you already have in place as part of your Office 365 subscriptions.  Microsoft Teams and Bookings are two often overlooked Microsoft applications included with Office 365.  These applications can help manage communications and operations while maintaining safe distances via Video Conferencing, Chat and scheduling.  OneDrive and SharePoint can be used for file sharing and collaboration.  These tools are not only great for the issues we’re dealing with today but are great productivity tools when we come out on the other side.

Microsoft Teams
Chat, Phone/Video Calls & Screensharing on your computer and mobile devices.  Microsoft Teams is the hub for team collaboration in Office 365 that integrates the people, content, and tools your team needs to be more engaged and effective. 

More Info: https://products.office.com/en-us/microsoft-teams/group-chat-software

Microsoft Bookings
Microsoft Bookings is an online and mobile app for small businesses who provide services to customers on an appointment basis. Examples of businesses include hair salons, dental offices, spas, law firms, financial services providers, realtors, consultants, and auto shops. 

More: https://www.microsoft.com/en-us/microsoft-365/business/scheduling-and-booking-app

Sharepoint/OneDrive
Share files, data, news, and resources. Customize your site to streamline your team’s work. Collaborate effortlessly and securely with team members inside and outside your organization, across PCs, Macs, and mobile devices.

More Info: https://products.office.com/en-us/sharepoint/collaboration

Remote PC Access & Support
If you have a monthly managed plan we can quickly facilitate remote access for your employees allowing access to their office desktops securely from home.  If you don’t have a monthly plan now is a great time to consider adding one.  It is the quickest way to secure your business and ensure smooth operations both in and out of the office. Additionally we are offering discounted options to add employees personal computers to the managed plans you currently have to ensure they have adequate support and security protections in place.

If you or anyone you know would like to discuss any of the options TMD Technology Services is here to help.  

Set up 2-step verification (MFA) for Office 365

User Instructions to set up 2-step verification for Office 365

To enhance security we will be adding 2-step verification (also called multi-factor authentication or MFA) to our email system. You will have to set up your account to use it.

By setting up 2-step verification, you add an extra layer of security to your Office 365 account. You sign in with your password (step 1) and a code sent to your phone (step 2).

  1. Sign in to Office 365 with your work or school account with your password like you normally do. After you choose Sign in, you’ll see this page:

First Sign in screen

  1. Choose Set it up now.
  2. Select your authentication method and then follow the prompts on the page. Or, watch the video to learn more.

Choose your authentication method and then follow the prompts on the screen.

  1. Once you complete the instructions to specify how you want to receive your verification code (We suggest Authentication phone and Send me a code by text message), the next time you sign in to Office 365, you’ll be prompted to enter the code that is sent to you by text message, phone call, etc. To have a new code sent to you, press F5.

    When you sign in with 2-step verification, you'll be prompted for a code.

  2. You’ll get an app password that you can use with Outlook, Apple Mail, your Android or Iphone, etc. Choose the copy icon to copy the password to your clipboard. You won’t need to memorize this password but be sure to capture it (take a picture or write it down) because you will not have the opportunity to see it again.

    Image of the copy icon to copy the app password to your clipboard.

Next steps

If you’re using other apps like Outlook on your desktop, you’ll need to to use this app password or you can create a new app password so they can connect to your Office 365 account.

Create an app password for Office 365

An app password is a code that gives an app or device permission to access your Office 365 account.If your admin has turned on set up 2-step verification for your organization, and you’re using apps that connect to your Office 365 account, you’ll need to generate an app password so the app can connect to Office 365. For example, if you’re using Outlook 2016 or earlier with Office 365, you’ll need to create an app password.

  1. Check whether your Office 365 admin has turned on 2-step verification for your account. If they haven’t, when you try to do these steps you won’t see the options in Office 365.
  2. If you haven’t already done so, set up your account to use 2-step verification.
  3. Sign in to Office 365 using your password and verification code.
  4. Choose Settings Office 365 Settings button > Office 365.
  5. Choose Security & Privacy > Additional security verification.

  1. Choose Update my phone numbers used for account security. This will display the following page:
  2. At the top of the page, choose App Passwords.

  1. Choose create to get an app password.
  2. If prompted, type a name for your app password (ex. Outlook), and click Next.

Choose copy to your clipboard.

Choose copy password to clipboard. You won’t need to memorize this password but it will not be able to be viewed again so ensure you capture it before closing.

Tip: If you create another app password, you’ll be prompted to name it. For example, you might name it “Outlook.”

  1. Go to the app that you want to connect to your Office 365 account. When prompted to enter a password, paste the app password in the box.

To use the app password in Outlook

You’ll need to do these steps once.

  1. Open Outlook, such as Outlook 2010, 2013, or 2016.
  2. Wherever you’re prompted for your password, paste the app password in the box. For example, if you’ve already added your account to Outlook, when prompted paste the app password here:Paste your app password in the Password box.
  3. Or, if you’re adding your Office 365 account to Outlook, enter your app password here:

Enter your app password in both Password boxes.

  1. Restart Outlook.

Install Skype for Business (Lync)

Install Skype for Business (Lync) on your Windows computer

First make sure Skype for Business (Lync) isn’t already installed.

  • Go to Start > Microsoft Office 2013 (Windows 7) or Start > Office 365 (Windows 8), and look for Skype for Business (Lync). If Skype for Business (Lync) is installed, you’re ready to go.

If Skype for Business (Lync) isn’t installed:

  1. Sign in to Office 365 with your work or school account.
  2. Go to Settings Office 365 setttings button - looks like a gear next to your name > 
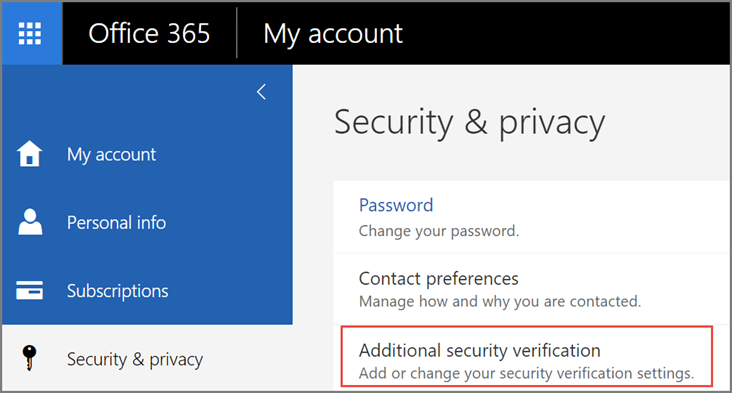
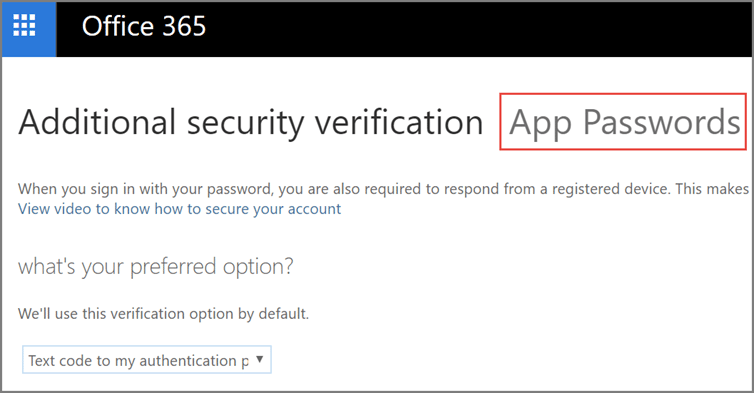
Office 365 Settings.
  3. Choose Software > Skype for Business (Lync).

officeskype

Keep in mind:

  • Skype for Business (Lync) may already be installed on your computer as part of Office 365.
  • If Skype for Business (Lync) isn’t listed, contact your workplace technical support to make sure your account includes the Skype for Business (Lync) Online service.

Install Skype for Business (Lync) on your mobile device

Go to your app store and search for Lync 2013. For details, see the Getting Started guide for your device at Microsoft Lync 2013 for Mobile Clients.

Install Skype for Business (Lync) on your Mac

If your organization installed Office for Mac Standard 2011 on or after October 1, 2011, then you already have Lync for Mac 2011.