Why use two-factor authentication (2FA) or Multifactor (MFA) with your VPN connection?

What is a VPN?

Virtual private networks (VPNs) have been a popular way for companies to provide their employees remote access to their private servers and network resources. VPNs create secure connections between remote machines and your servers allowing your users to stay productive when out of the office. VPNs reduce the risk that hackers can find and enter your servers while your employees securely work from home or anywhere for that matter.

While VPNs are great, they are far from a perfect solution and are subject to security threats, such as phishing attacks. For example, an attacker will often send a legitimate looking email to one of your employees and invite them to log into their account via a link in the email to update their information, pay a bill, or other…. The hacker only has to wait for the unsuspecting employee to enter their username and password. Once in possession of valid credentials, the attacker will be able to connect to your VPN as a legitimate user, gain access to your network, steal information or cause other types of damage such as deploying ransomware.

How 2FA two-factor authentication secures your VPN network

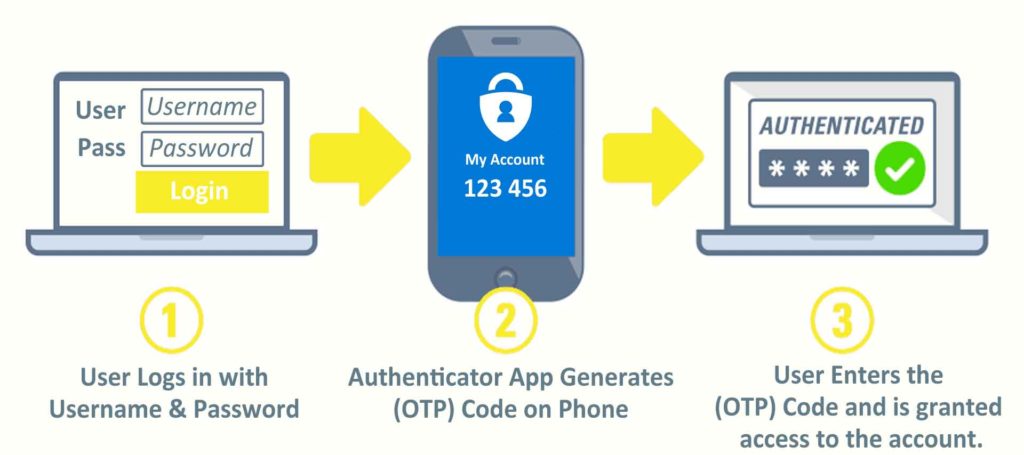
Two-factor authentication (2FA) reduces the risk that hackers can access your network using these stolen or compromised credentials. 2FA requires users to validate their identity by presenting a second security factor in addition to their password. When connecting to a corporate network, users must first enter their computer or VPN credentials, followed by a time-based one-time password (TOTP). This TOTP (usually a 6 digit numeric code) is displayed on users mobile phone in an application called an authenticator. Google Authenticator and Microsoft Authenticator are 2 popular and free apps compatible with both iPhone and Android devices.

2FA makes it extremely difficult to impersonate a user without having access to this second factor. This means that even if hackers were to steal all of your employees’ usernames and passwords, they still wouldn’t be able to access your VPN because they don’t have the 2FA code generated in the authenticator app.

How can I enable 2FA for my company’s VPN?

Every firewall and network is a little different and thus the configuration can vary dramatically. If you are interested in securing your network with 2FA please reach out to TMD Technology Services to assist you in determining the best path forward.

Aside from your VPN we highly recommend using 2FA on all your important accounts including email, banking, website and social media.

Sage 300 1099 NEC form new for year 2020 for Accounts Payable Nonemployee Compensation

Sage 1099 NEC Summary

The IRS has created the Form 1099-NEC for filing Non-employee compensation payments for 2020 which is was reported on the Form 1099-MISC.

Check on the IRS website for more information on Form 1099-NEC.

Why did the IRS reintroduce 1099-NEC?

Before its reintroduction, the last time form 1099-NEC was used was back in 1982. Since then, prior to tax year 2020, businesses typically filed Form 1099-MISC to report payments totaling $600 or more to a nonemployee for certain payments from the trade or business. These payments generally represent nonemployee compensation and, up until now, would typically appear in box 7 of 1099-MISC.

In order to help clarify the separate filing deadlines when reporting different types of payments on Form 1099-MISC, the IRS decided to reintroduce Form 1099-NEC which has a single filing deadline for all payments that use the form.

If you have Sage 17.1.x, Sage 18.1.x you will need to upgrade to sage 20.3 in order to use the 1099 NEC.

Resolution

The Form 1099-NEC updates are included in the following Product Updates: 2021.1, 2020.4 & 2019.7.

If you need to upgrade your sage installation we can help.  Call Today (561) 404-9251

Microsoft Patch Causing Network Issues on Windows 7 and Windows 2008R2 Systems

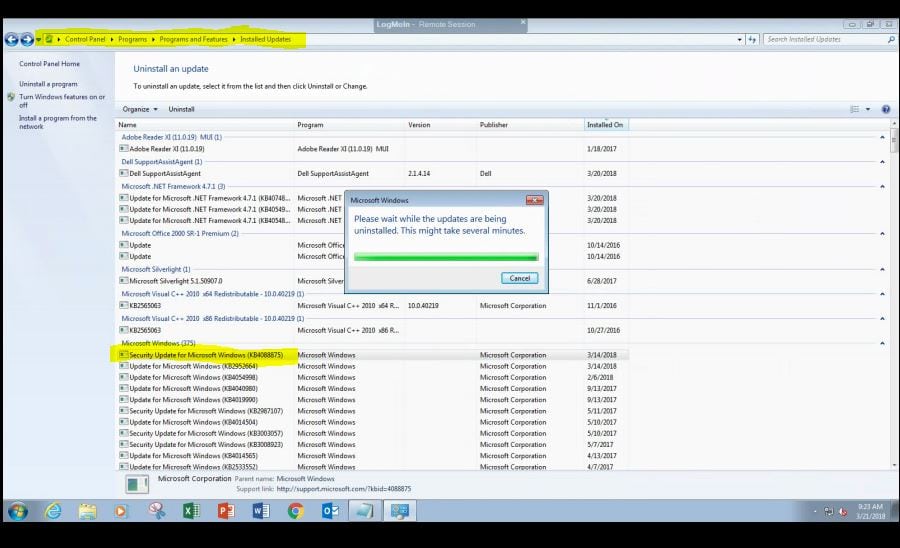
There is a known issue with Microsoft’s March Security Patch Rollup (KB 4088875), which is breaking the network connection for the device after the patch is installed and the device is rebooted.

Microsoft has not yet officially acknowledged this issue or provided any steps for a fix. In the meantime, our team has been testing remediation steps for this issue. If this patch was installed and your device was rebooted, we recommend you take any of the following steps to restore the network connection:

  1. Manually update the network settings to revert back to the original configuration.
  2. If the machine has not yet been rebooted, you can uninstall the patch to avoid any issues
  3. Manually deploy a script, which was used to correct a similar issue in a previous patch rollup. More details here.

We will continue to monitor for any updates from Microsoft or if any new errors are discovered.

We have immediately globally blacklisted this patch for our Managed IT Service Customers to prevent this from being installed on all resources until we receive further information from Microsoft.


Remove The Update Before It Breaks Your Network Adapter

File Folder Creation Takes Several Minutes or Freezes and Crashes

So you’re running Windows 10 and are accessing file and folder shares over your network.  You would think creating a new folder would be a simple task but then you find your computer freezes for several minutes when simply creating a new folder. On all other occasions, the windows explorer locks down, and the cursor is left after the last letter entered in the new folder name. The folder gets a time stamp immediately, but it takes 2-3 minutes before it locks up and you can continue to work.  We have also noted this behavior on local drives (C: and D:).

We found creating a folder using command prompt works immediately.  (md c:\TMD results in a folder named TMD on the c drive with no hesitation)

If you have been frustrated with this issue you’re not alone!  After spending countless hours troubleshooting this issue and doing everything from removing antivirus and malware protection to disabling offline files and search indexing it appears to be a Microsoft bug.  In an update posted 1/26/2017 which we didn’t see it directly reference this issue but after install the delay was gone.  see here

Symptoms:  On the problematic computer, when trying to create a new folder in Windows Explorer on a network file share, there is a long delay anywhere from a 1-3 minutes before the folder is created.  The delay locks the Windows Explorer window completely and occasionally will generate an error.  We have seen this folder creation issue on multiple brand new out of the box machines running Windows 10 build 1607 (Anniversary Edition).

The Fix: You can find the fix on Microsoft’s Update Catalog (KB32116755)

If this was helpful please let us know!

3 Tips to Help Acclimate to Windows 10

windows-10-logoHere are 3 Quick Tips to help navigate Windows 10, without losing productivity:

1. The Start Menu

For you Windows 7 users, rest easy, because this is here to stay. For the Windows 8 users, the start menu is back with its full functionality – and then some. The aesthetics of the new start menu combine the basics of the start menu from Windows 7 with the sleek tiles that were a part of Windows 8. The customization of this helps you to access what you need much faster and boosts productivity. Open the Start Menu, click on Settings, Personalization, and then Start. Make the Start Menu work for you.

2. Microsoft Edge

Although this is the new web browser, do not worry – Internet Explorer 11 will be available by default in your upgrade. It is worth noting that many business applications remain untested with Microsoft Edge. If you find that Microsoft Edge is popping up as your default browser, this article will help you with that. Remember that super awesome Start Menu we spoke about above? Click in the search bar right next to it, and type “Default Programs.” Open that up, find Internet Explorer on the left, and click on it. There will now be an option to click that states “Set this program as default.”

3. Search Enhancements

Find anything on your PC. No, really. On the bottom left, to the right of the Start Menu, type a term in that search box. If it doesn’t automatically populate, click on the “My Stuff” icon on the bottom of that pop-up window. Your machine will be scanned for files, applications, pictures – just about anything – containing any or all of that search term within that file name. Don’t catch yourself drilling down through menus trying to find something. Don’t waste your time digging and trying to find that one file you thought you’d never need again. Use this search function to help save time.

www.TMDTechnology.com