Set up 2-step verification (MFA) for Office 365

User Instructions to set up 2-step verification for Office 365

To enhance security we will be adding 2-step verification (also called multi-factor authentication or MFA) to our email system. You will have to set up your account to use it.

By setting up 2-step verification, you add an extra layer of security to your Office 365 account. You sign in with your password (step 1) and a code sent to your phone (step 2).

  1. Sign in to Office 365 with your work or school account with your password like you normally do. After you choose Sign in, you’ll see this page:

First Sign in screen

  1. Choose Set it up now.
  2. Select your authentication method and then follow the prompts on the page. Or, watch the video to learn more.

Choose your authentication method and then follow the prompts on the screen.

  1. Once you complete the instructions to specify how you want to receive your verification code (We suggest Authentication phone and Send me a code by text message), the next time you sign in to Office 365, you’ll be prompted to enter the code that is sent to you by text message, phone call, etc. To have a new code sent to you, press F5.

    When you sign in with 2-step verification, you'll be prompted for a code.

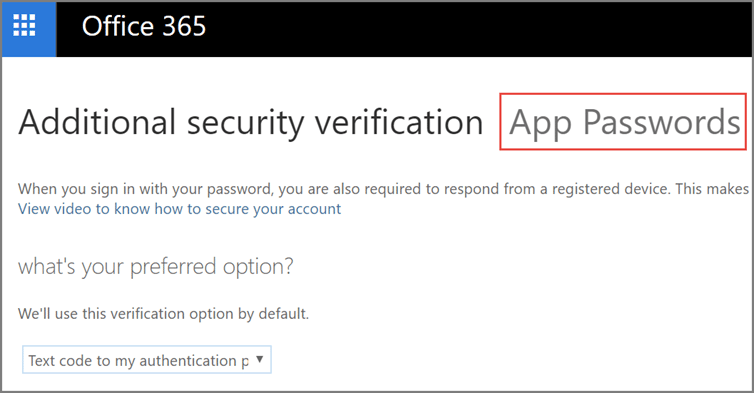
  2. You’ll get an app password that you can use with Outlook, Apple Mail, your Android or Iphone, etc. Choose the copy icon to copy the password to your clipboard. You won’t need to memorize this password but be sure to capture it (take a picture or write it down) because you will not have the opportunity to see it again.

    Image of the copy icon to copy the app password to your clipboard.

Next steps

If you’re using other apps like Outlook on your desktop, you’ll need to to use this app password or you can create a new app password so they can connect to your Office 365 account.

Create an app password for Office 365

An app password is a code that gives an app or device permission to access your Office 365 account.If your admin has turned on set up 2-step verification for your organization, and you’re using apps that connect to your Office 365 account, you’ll need to generate an app password so the app can connect to Office 365. For example, if you’re using Outlook 2016 or earlier with Office 365, you’ll need to create an app password.

  1. Check whether your Office 365 admin has turned on 2-step verification for your account. If they haven’t, when you try to do these steps you won’t see the options in Office 365.
  2. If you haven’t already done so, set up your account to use 2-step verification.
  3. Sign in to Office 365 using your password and verification code.
  4. Choose Settings Office 365 Settings button > Office 365.
  5. Choose Security & Privacy > Additional security verification.

  1. Choose Update my phone numbers used for account security. This will display the following page:
  2. At the top of the page, choose App Passwords.

  1. Choose create to get an app password.
  2. If prompted, type a name for your app password (ex. Outlook), and click Next.

Choose copy to your clipboard.

Choose copy password to clipboard. You won’t need to memorize this password but it will not be able to be viewed again so ensure you capture it before closing.

Tip: If you create another app password, you’ll be prompted to name it. For example, you might name it “Outlook.”

  1. Go to the app that you want to connect to your Office 365 account. When prompted to enter a password, paste the app password in the box.

To use the app password in Outlook

You’ll need to do these steps once.

  1. Open Outlook, such as Outlook 2010, 2013, or 2016.
  2. Wherever you’re prompted for your password, paste the app password in the box. For example, if you’ve already added your account to Outlook, when prompted paste the app password here:Paste your app password in the Password box.
  3. Or, if you’re adding your Office 365 account to Outlook, enter your app password here:

Enter your app password in both Password boxes.

  1. Restart Outlook.

Install Skype for Business (Lync)

Install Skype for Business (Lync) on your Windows computer

First make sure Skype for Business (Lync) isn’t already installed.

  • Go to Start > Microsoft Office 2013 (Windows 7) or Start > Office 365 (Windows 8), and look for Skype for Business (Lync). If Skype for Business (Lync) is installed, you’re ready to go.

If Skype for Business (Lync) isn’t installed:

  1. Sign in to Office 365 with your work or school account.
  2. Go to Settings Office 365 setttings button - looks like a gear next to your name > 
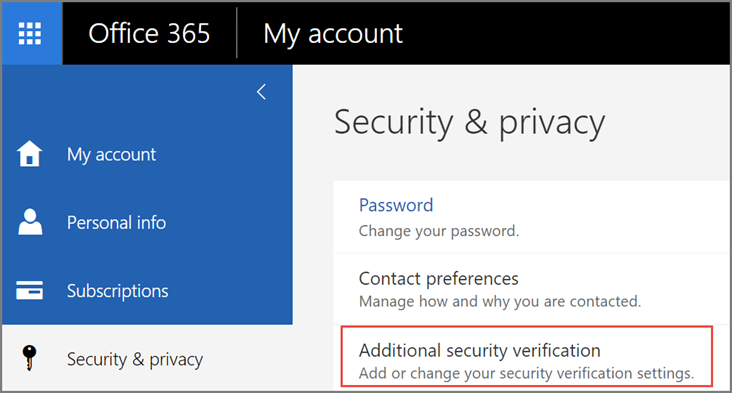
Office 365 Settings.
  3. Choose Software > Skype for Business (Lync).

officeskype

Keep in mind:

  • Skype for Business (Lync) may already be installed on your computer as part of Office 365.
  • If Skype for Business (Lync) isn’t listed, contact your workplace technical support to make sure your account includes the Skype for Business (Lync) Online service.

Install Skype for Business (Lync) on your mobile device

Go to your app store and search for Lync 2013. For details, see the Getting Started guide for your device at Microsoft Lync 2013 for Mobile Clients.

Install Skype for Business (Lync) on your Mac

If your organization installed Office for Mac Standard 2011 on or after October 1, 2011, then you already have Lync for Mac 2011.

What is Office 365? How is it different from Microsoft Office?

Microsoft-Office-365Office 365” refers to subscription plans that include access to Office applications plus other productivity services that are enabled over the Internet (cloud services), such as Lync web conferencing and Exchange Online hosted email for business, and additional online storage with OneDrive and Skype world minutes for home.
Many Office 365 plans also include the desktop version of the latest Office applications, which users can install across multiple computers and devices. The Office 365 plans that are online-only are a great choice for certain business needs, and they are compatible with desktop versions of the latest version of Office, Office 2010, Office 2007 (with slightly limited functionality), Office 2011 for Mac, and Office 2008 for Mac.

All Office 365 plans are paid for on a subscription basis, monthly or annually.  “Microsoft Office” is the name we still use for our familiar productivity software. Office suites have traditionally included applications such as Word, Excel, PowerPoint, and Outlook. All the new Office suites (for example, Office Standard 2013) include the latest versions of these applications. These suites can be installed on only one PC and do not come with any cloud-based services included in Office 365.

Don’t try setting up office 365 on your own.  Let TMDTechnology.com help today!