Outlook 2013 | 2010 – Export Auto Fill / Auto Complete data

This document will assist with the locating and saving a AutoFill / AutoComplete file in Outlook 2013.

Note: This document will help you locate the auto complete Stream_Autocomplete file associate with your Outlook account, for outlook 2010 and Outlook 2013 using Windows 7 and 8/8.1. The path where the file is stored is C:\Users\*username*\AppData\Local\Microsoft\Outlook\RoamCache. Below are directions on how to find this file.

*Show Hidden Files and Folders*

How to locate and save the “Auto Complete file” in Outlook 2010/2013 for Windows 7/8.1.

    1. Open Start Menu.
      • Win 7: Select the Windows Start Button.
      • Win 8/8.1: Press the Start Button on your keyboard to launch the Windows 8 tile menu or hover your cursor toward the lower left corner of your window to make the Start Button appear.
Windows 7 Windows 8/8.1
Windows7Startbutton Windows 8 Start button
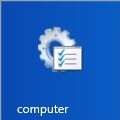
    1. Double-click on Computer if using Windows 7, for Windows 8/8.1 users type Computer and select the Computer tile
      • Windows 7

Windows 7 Computer folder

      • Windows 8/8.1

Computertile

    1. Double-click on Local disk C:

Windows 8 Local Disk C

  1. Double-click on Users folder.

Users folder

    1. Double-click on Username of the target user.

Users Profile

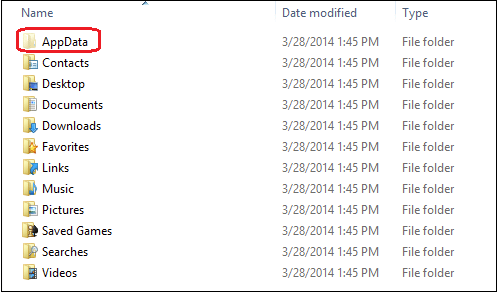
    1. Double-click on the AppData folder.
      • Must have administrative privileges

AppData folder

    1. Double-click on the Local folder.

Local folder

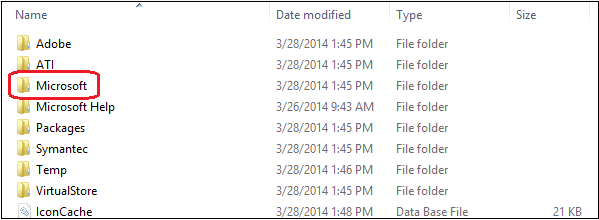
    1. Double-click on Microsoft folder.

Microsoft folder

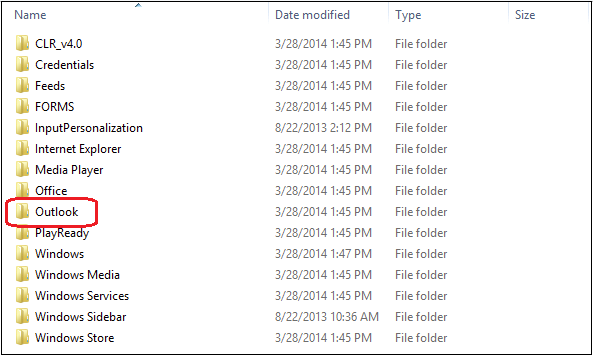
    1. Double-click on Outlook.

Outlook folder

    1. Double-click on RoamCache.

RoamingCache folder

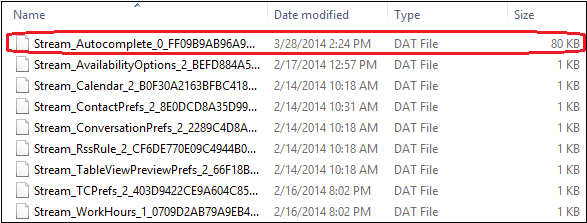
    1. The file that starts with Stream_Autocomplete_**** contains the Autocomplete file used in Office 2013.

Stream_AutoComplete File>

  1. Save this file to a flash drive or other media target and use it to import the Auto Complete names into another Outlook 2013 account.
  2. To import first rename any existing autocomplete file to autocompletexxx.old Then you must rename the newly imported file to match the existing file name in the target location.

Create and add an email signature in Outlook Web App

Create a signature

  1. Sign in to Outlook Web App. For help, see Sign in to Outlook Web App.
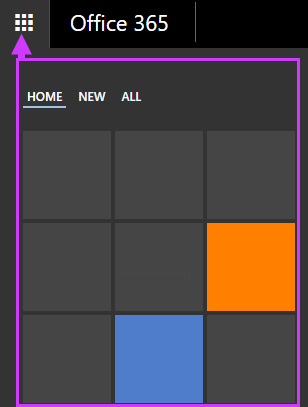
  2. On the nav bar, choose Outlook (or Mail).OrChoose App launcher Office 365 app launcher icon > Outlook.

    Office 365 navigation options

  3. On the nav bar, choose Settings Settings icon > Options.
  4. Under Options, choose Settings > Mail.OrUnder Options, choose MAIL > Layout > Email signature.
  5. Under Email signature, in the text box, type the signature you want to use. Use the formatting mini toolbar to change the appearance of the signature.
  6. If you want your signature to display at the bottom of all outgoing items, including replies and forwards, select Automatically include my signature on messages I send. If you don’t select this option, you manually can add your signature to any message.
  7. Choose Save.


Manually add your signature to a new message

If you’ve created a signature, but didn’t select the option to add your signature to all outgoing messages, you manually can add it to specific messages.

  1. Sign in to Outlook Web App.
  2. On the nav bar, choose Outlook (or Mail).OrChoose App launcher Office 365 app launcher icon > Outlook.

    Office 365 navigation options

  3. Choose New mail above the folder list. A new message form opens in the reading pane.
  4. At the top of the message, choose insert Insert > Signature (or Your signature).
  5. When your message is ready to go, choose send Send.

Automatically add your signature to every message you send

If you’ve created a signature, you can specify if the signature is added to all outgoing messages, including replies and forwards.

  1. Sign in to Outlook Web App.
  2. On the nav bar, choose Outlook (or Mail).OrChoose App launcher Office 365 app launcher icon > Outlook.

    Office 365 navigation options

  3. On the nav bar, choose Settings Settings icon > Options.
  4. Under Options, choose Settings > Mail.OrUnder Options, choose MAIL > Layout > Email signature.
  5. Under Email signature, do one of the following:
    • To include your signature at the bottom of all outgoing items, select the Automatically include my signature on messages I send check box.
    • To exclude your signature from showing at the bottom of all outgoing messages, clear theAutomatically include my signature on messages I send check box.

What is Office 365? How is it different from Microsoft Office?

Microsoft-Office-365Office 365” refers to subscription plans that include access to Office applications plus other productivity services that are enabled over the Internet (cloud services), such as Lync web conferencing and Exchange Online hosted email for business, and additional online storage with OneDrive and Skype world minutes for home.
Many Office 365 plans also include the desktop version of the latest Office applications, which users can install across multiple computers and devices. The Office 365 plans that are online-only are a great choice for certain business needs, and they are compatible with desktop versions of the latest version of Office, Office 2010, Office 2007 (with slightly limited functionality), Office 2011 for Mac, and Office 2008 for Mac.

All Office 365 plans are paid for on a subscription basis, monthly or annually.  “Microsoft Office” is the name we still use for our familiar productivity software. Office suites have traditionally included applications such as Word, Excel, PowerPoint, and Outlook. All the new Office suites (for example, Office Standard 2013) include the latest versions of these applications. These suites can be installed on only one PC and do not come with any cloud-based services included in Office 365.

Don’t try setting up office 365 on your own.  Let TMDTechnology.com help today!